Portenta 보드에는 Murata 1DX 칩을 사용하는데 WiFi와 Bluetooth(BLE 5 via Cordio stack, BLE 4.2 via Arduino Stack)를 지원합니다. 이중 WiFi는 지난번에 사용해 봤기 때문에 이번에는 Bluetooth를 테스트해 보았습니다.
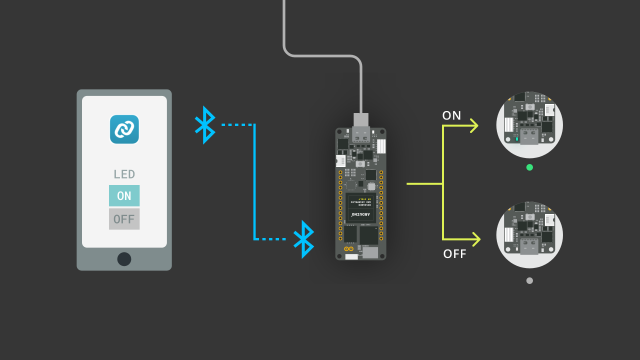
블루투스 테스트 환경은 아래 그림과 같습니다.
스마트폰과 블루투스로 연결하여 LED On/Off 명령어를 전송하면 보드의 LED가 켜지거나 꺼집니다.
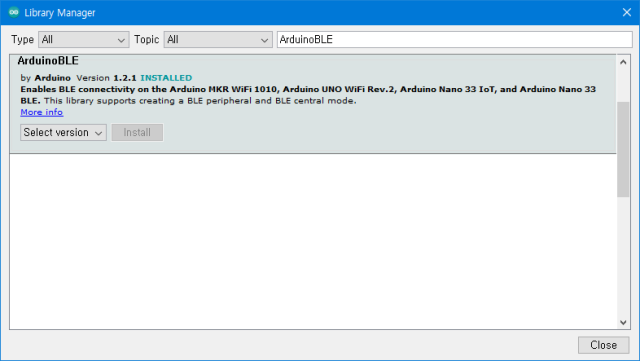
우선 Portenta H7 보드에서 Bluetooth를 사용하기 위해서는 ArudinoBLE 라이브러리를 먼저 설치해야 합니다.
라이브러리 매니저에서 ArudinoBLE로 검색하여 설치합니다.
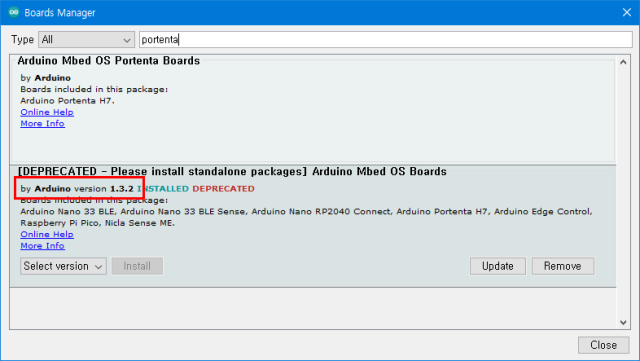
다음은 가장 중요한 부분인데 제가 테스트한 바로는 Mbed OS의 버전이 1.3.2 버전 이상에서는 BLE가 동작되지 않습니다. 따라서 보드 매니저를 사용하여 Mbed OS의 버전을 1.3.2로 낮춰줍니다.
설치가 완료되었다면 새 스케치를 아래와 같이 작성합니다.
#include <ArduinoBLE.h>

BLEService ledService("19b10000-e8f2-537e-4f6c-d104768a1214");

// BLE LED Switch Characteristic - custom 128-bit UUID, read and writable by central
BLEByteCharacteristic switchCharacteristic("19b10000-e8f2-537e-4f6c-d104768a1214", BLERead | BLEWrite);

const int ledPin = LED_BUILTIN; // Pin to use for the LED

void setup() {
  Serial.begin(9600);
  //while (!Serial);   // Uncomment to wait for serial port to connect.

  // Set LED pin to output mode
  pinMode(ledPin, OUTPUT);
  digitalWrite(ledPin, HIGH);

  // Begin initialization
  if (!BLE.begin()) {
    Serial.println("Starting BLE failed!");
    digitalWrite(LEDR, LOW);
    delay(1000);
    digitalWrite(LEDR, HIGH);

    // Stop if BLE couldn't be initialized.
    while (1);
  }

  // Set advertised local name and service UUID:
  BLE.setLocalName("LED-Portenta-01");
  BLE.setAdvertisedService(ledService);

  // Add the characteristic to the service
  ledService.addCharacteristic(switchCharacteristic);

  // Add service
  BLE.addService(ledService);

  // Set the initial value for the characeristic:
  switchCharacteristic.writeValue(0);

  // start advertising
  BLE.advertise();
  digitalWrite(LEDB, LOW);
  delay(1000);
  digitalWrite(LEDB, HIGH);
  Serial.println("BLE LED Control ready");
}

void loop() {
  // Listen for BLE peripherals to connect:
  BLEDevice central = BLE.central();

  // If a central is connected to peripheral:
  if (central) {
    Serial.print("Connected to central: ");
    // Print the central's MAC address:
    Serial.println(central.address());
    digitalWrite(LEDB, HIGH);
    delay(100);
    digitalWrite(LEDB, LOW);
    delay(100);
    digitalWrite(LEDB, HIGH);

    // While the central is still connected to peripheral:
    while (central.connected()) {
      // If the remote device wrote to the characteristic,
      // Use the value to control the LED:
      if (switchCharacteristic.written()) {
        if (switchCharacteristic.value()) {   // Any value other than 0
          Serial.println("LED on");
          digitalWrite(ledPin, LOW);          // Will turn the Portenta LED on
        } else {
          Serial.println("LED off");
          digitalWrite(ledPin, HIGH);         // Will turn the Portenta LED off
        }
      }
    }

    // When the central disconnects, print it out:
    Serial.print("Disconnected from central: ");
    Serial.println(central.address());
    digitalWrite(LEDB, HIGH);
    delay(100);
    digitalWrite(LEDB, LOW);
    delay(100);
    digitalWrite(LEDB, HIGH);
  }
}
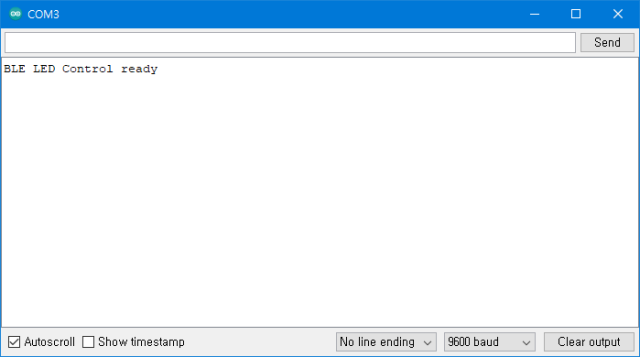
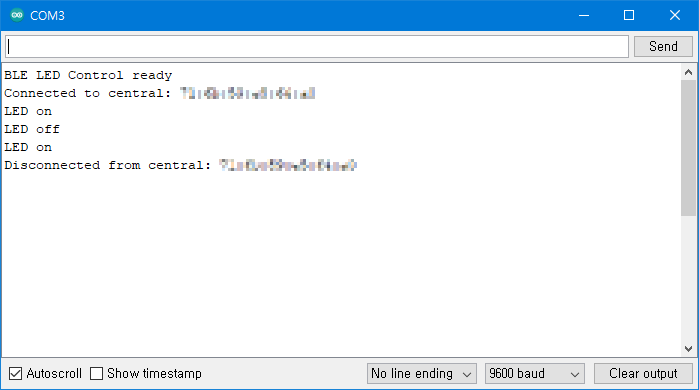
코드를 업로드한 후 시리얼 창을 열면 보드의 파란색 LED가 한번 켜졌다가 꺼지고 아래와 같이 준비되었다는 메시지가 나옵니다.
핸드폰에서 nRF Connect for Mobile 어플을 설치합니다.
nRF Connect for Mobile - Google Play 앱
모바일 용 nRF Connect를 사용하여 Bluetooth 저에너지 장치를 스캔하고 검색하십시오.
play.google.com
설치 후 실행해 봅니다.
만약 스마트폰의 Bluetooth와 GPS가 꺼져 있으면 켜고 블루투스 디바이스를 검색해 봅니다.
검색이 되면 아래 그림의 오른쪽 그림과 같이 LED-Portenta-01 장치가 보입니다.
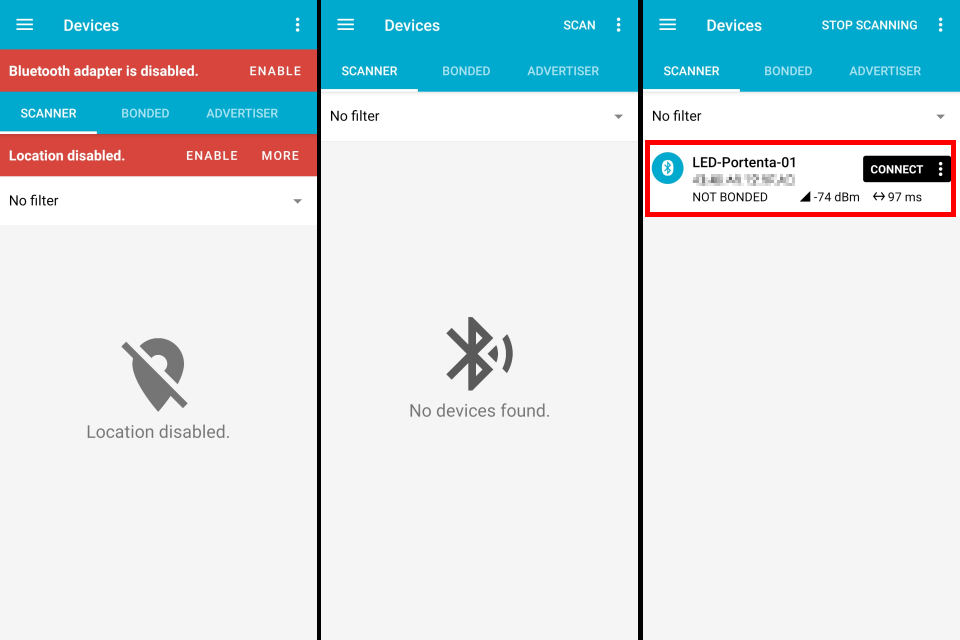
LED-Portenta-01 장치에 연결을 합니다.
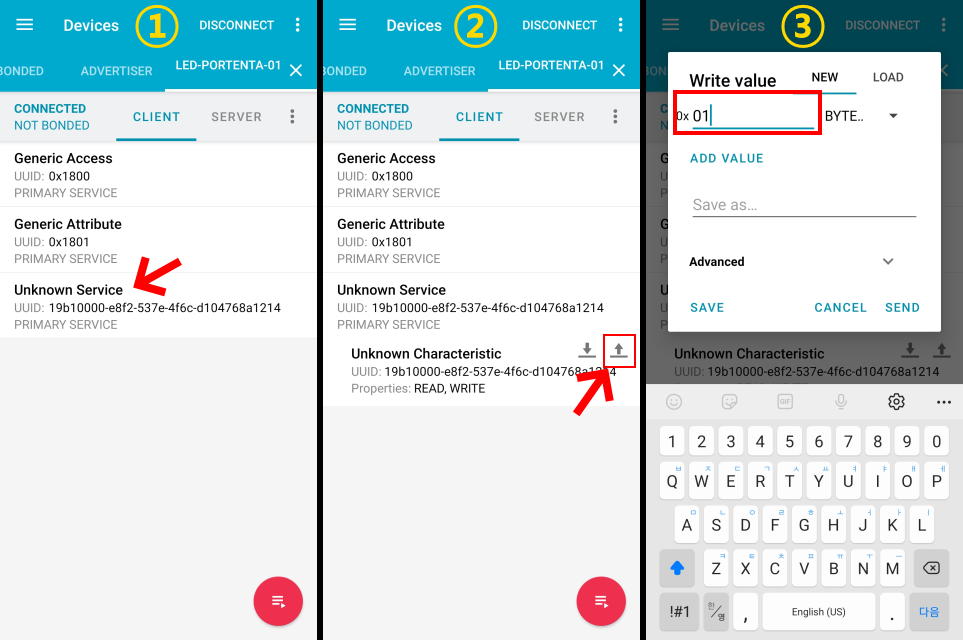
CLIENT 탭의 아래쪽에 Unknown Service가 보이고 위의 소스코드에서 사용한 "19b10000-e8f2-537e-4f6c-d104768a1214"의 속성 값이 보입니다. (아래 1번 이미지 참고)
서비스를 선택하면 오른쪽에 아래/위 화살표가 보입니다. 위쪽(업로드) 화살표를 선택합니다.(아래 2번 이미지 참고)
Write value에 0x01 또는 0x00을 입력하여 Portenta H7 보드의 LED가 녹색으로 ON/OFF 되는지 확인해 봅니다.(아래 3번 이미지 참고)
입력값에 따라 LED가 On/Off되며 동시에 시리얼 창에 아래와 같이 on/off 로그가 찍히며 동작됨을 확인할 수 있습니다.
아래는 스마트폰과 Portent H7을 Bluetooth로 연결하여 테스트한 영상입니다.
'Hardware > Arduino ( AVR )' 카테고리의 다른 글
| [아두이노] WAV 파일 재생하기 (MP3파일을 WAV 파일로 변환) (0) | 2022.02.15 |
|---|---|
| [아두이노] Micro SD 카드 사용하기 (0) | 2022.02.14 |
| [Portenta H7] I2C를 사용하여 OLED 테스트 (0) | 2021.10.22 |
| [Portenta H7] 업로드가 안되는 경우 보드 복구 방법 (0) | 2021.10.21 |
| [Portenta H7] Wi-Fi Access Point로 사용하기 (0) | 2021.10.20 |


댓글